Creating your First iOS App (User-to-User chat)
This guide walks you through how to build a new iOS Mobile app that will enable in-app user-to-user chat between platforms.
Create a new App
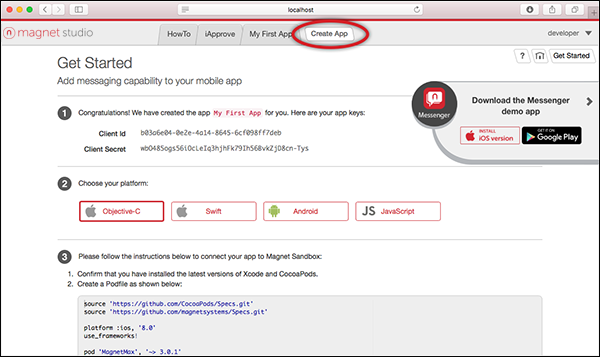
Open Magnet Studio.
Click the Create App button in the navigation bar.
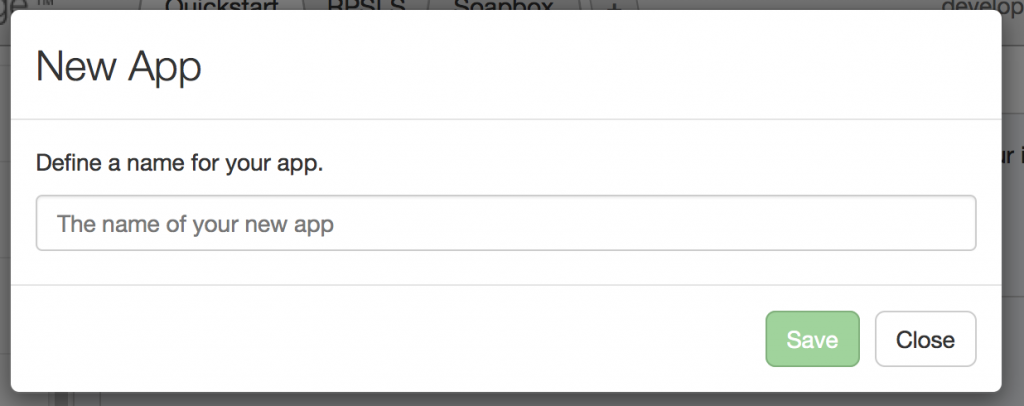
Enter a name for your app. Click Save to create your new app.
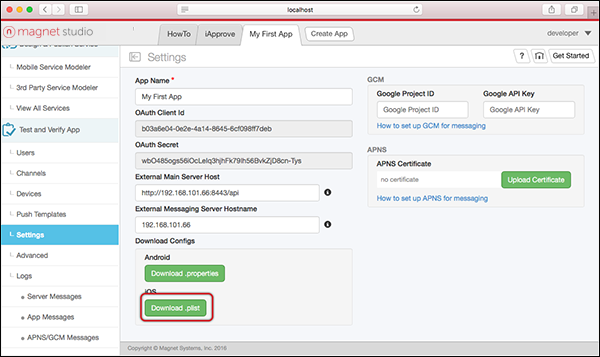
Download MagnetMax.plist (from the Settings screen) and include in it in your new Xcode project.
Add the Magnet Message library to your Xcode project with CocoaPods. See the CocoaPods Get Started guide for more information.
source 'https://github.com/CocoaPods/Specs.git'
source 'https://github.com/magnetsystems/Specs.git'
platform :ios, '8.0'
use_frameworks!
pod 'MagnetMax', '~> 2.7'
Initialize the MagnetMax SDK.
// In your AppDelegate
import MagnetMax;
func application(application: UIApplication, didFinishLaunchingWithOptions launchOptions: [NSObject: AnyObject]?) -> Bool {
// Initialize MagnetMax
let configurationFile = NSBundle.mainBundle().pathForResource("MagnetMax", ofType: "plist")
let configuration = MMPropertyListConfiguration(contentsOfFile: configurationFile!)
MagnetMax.configure(configuration!)
// Your code ...
return true
}
Register yourself as a Magnet Message User.
let user = MMUser()
user.firstName = "John"
user.lastName = "Doe"
user.userName = "john.doe@magnet.com"
user.password = "magnet"
user.register({ user in
print(user)
}, failure: { error in
print(error.localizedDescription)
})
Log in with the user created in the previous step, and initialize Magnet Message.
let username = "jane.doe@magnet.com"
let password = "magnet"
let credential = NSURLCredential(user: username, password: password, persistence: .None)
MMUser.login(credential,
success: {
print(MMUser.currentUser())
MagnetMax.initModule(MMX.sharedInstance(),
success: {
print("Init Success!")
},
failure: { error in
print("\(error)")
})
},
failure: { error in
print(error.localizedDescription)
})
Get the current user after logging in.
let currentUser = MMUser.currentUser()
Get Users. For example, to find users with known user names, use the code example below.
MMUser.usersWithUserNames(["john.doe@magnet.com","jane.doe@magnet.com"], success: { users in
print("Users are \(users)")
}) { error in
print("\(error)")
}
Create a chat channel with recipients.
// let johnDoe: MMUser ...
// let janeSmith: MMUser ...
let recipients: Set<MMUser> = [johnDoe, janeSmith]
var myChatChannel: MMXChannel?
MMXChannel.createWithName(name, summary: summary, isPublic: false, publishPermissions: .Subscribers, subscribers: recipients, success: { channel in
myChatChannel = channel
}, failure: { error in
})
NOTE: In most cases the chat channel should be private. Only channel owners can invite people into the chat.
Send the message.
let content = ["foo": "bar"]
// Build the message
let message = MMXMessage(toChannel: myChatChannel, messageContent: content)
myChatChannel.publishMessage(message, success: {
// do something
}, failure: { error in
// do something
})
Register for a notification to receive the message and chat invitation.
override func viewWillAppear(animated: Bool) {
super.viewWillAppear(animated)
// Indicate that you are ready to receive messages now!
MMX.start()
NSNotificationCenter.defaultCenter().addObserver(
self,
selector: "didReceiveMessage:",
name: MMXDidReceiveMessageNotification,
object: nil)
NSNotificationCenter.defaultCenter().addObserver(
self,
selector: "didReceiveChannelInvite:",
name: MMXDidReceiveChannelInviteNotification,
object: nil)
}
Once MMX has started, you can continue to implement your notification code as shown below:
func didReceiveMessage(notification: NSNotification) {
let userInfo : [NSObject : AnyObject] = notification.userInfo!
let message = userInfo[MMXMessageKey] as! MMXMessage
}
func didReceiveChannelInvite(notification: NSNotification) {
// Do something with the invite
let userInfo : [NSObject : AnyObject] = notification.userInfo!
let invite = userInfo[MMXInviteKey] as! MMXInvite
}
override func viewWillDisappear(animated: Bool) {
super.viewWillDisappear(animated)
NSNotificationCenter.defaultCenter().removeObserver(self)
}
Invite more users into the chat using the same invitation process described in Private Discussion Group.
Get the chat history.
let limit: Int32 = 10
let offset: Int32 = 0
let now = NSDate()
let anHourAgo = now.dateByAddingTimeInterval(-(60 * 60))
let ascending = false
channel.messagesBetweenStartDate(anHourAgo, endDate: now, limit: limit, offset: offset, ascending: ascending, success: { totalCount, message in
}, failure: { error in
})
Get all chat recipients.
let myChatChannel: MMXChannel = ...
myChatChannel.subscribersWithLimit(100, offset: 0, success: { totalCount, subscribers in
}, failure: { error in
})
Set up disconnection handling. A user can be redirected to the login screen on disconnect with the code below.
override func viewWillAppear(animated: Bool) {
super.viewWillAppear(animated)
NSNotificationCenter.defaultCenter().addObserver(self, selector: "didDisconnect:", name: MMUserDidReceiveAuthenticationChallengeNotification, object: nil)
}
func didDisconnect(notification: NSNotification) {
// Indicate that you are not ready to receive messages now!
MMX.stop()
// Redirect to the login screen
// When the user logs in you will need to reinitialize MMX
}
override func viewWillDisappear(animated: Bool) {
super.viewWillDisappear(animated)
NSNotificationCenter.defaultCenter().removeObserver(self)
}
Next Steps
See how to send and receive Rich Messages in your app.
